Visual Studio Code (VSCode) is a cross-platform source-code editor made by Microsoft. Features include support for debugging, syntax highlighting, intelligent code completion, snippets, code refactoring, and embedded Git.
This tutorial provides instructions for using the Visual Studio Code Remote - a VSCode extension connecting your local VSCode to the cluster server.
Note
This tutorial makes use of singularity container to run the VSCode server, which can be a limit if you want to access other cluster software (e.g MATLAB, GNU make) through the VSCode. There are different methods to run VSCode server natively on the cluster compute node. This document provides a comprehensive overview of those different methods.
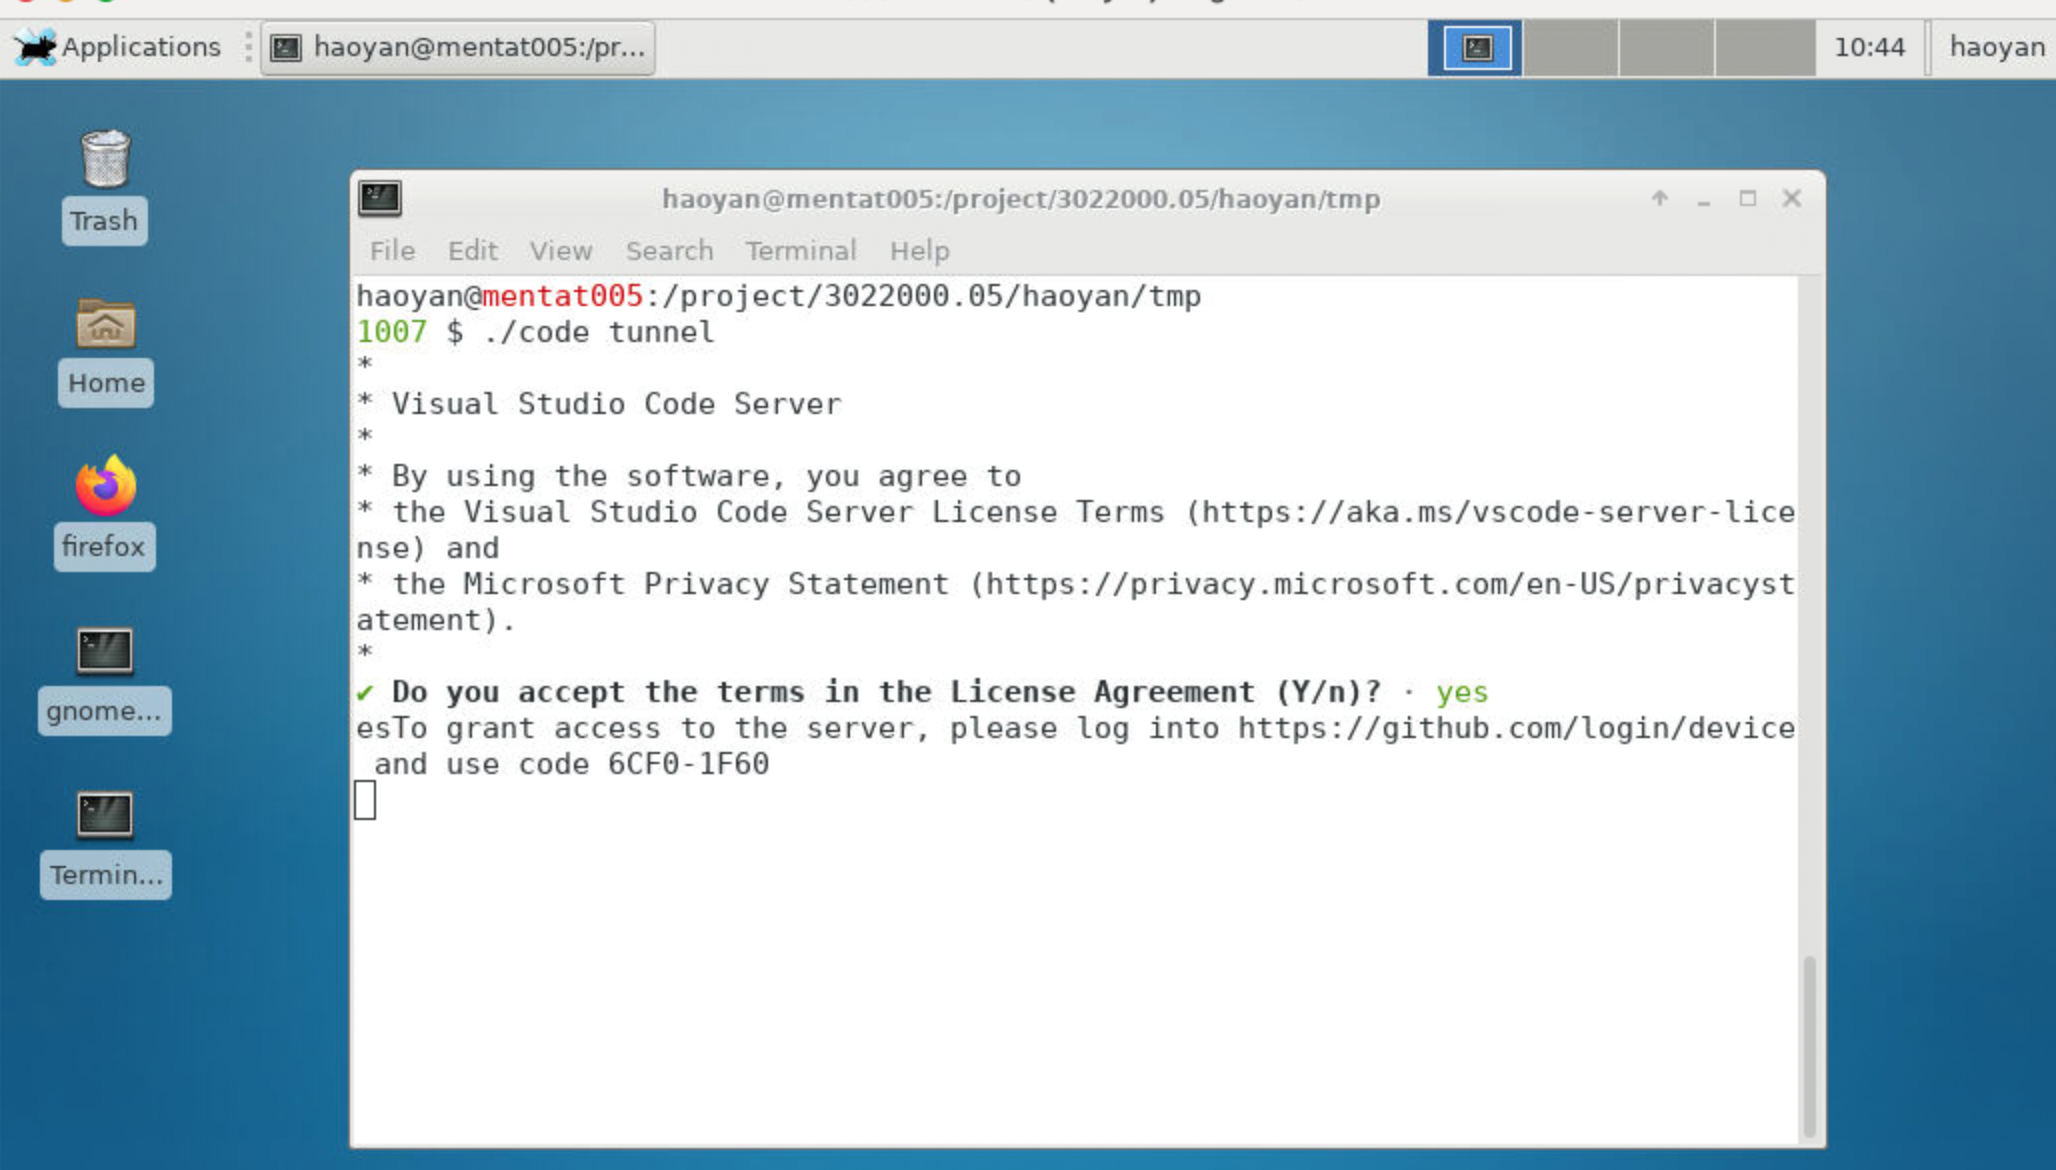
This step will setup and run the code CLI via an interactive job on the cluster. This CLI will establish a tunnel enabling code changing, testing and debugging on the cluster from a VSCode graphical interface running on your local computer.
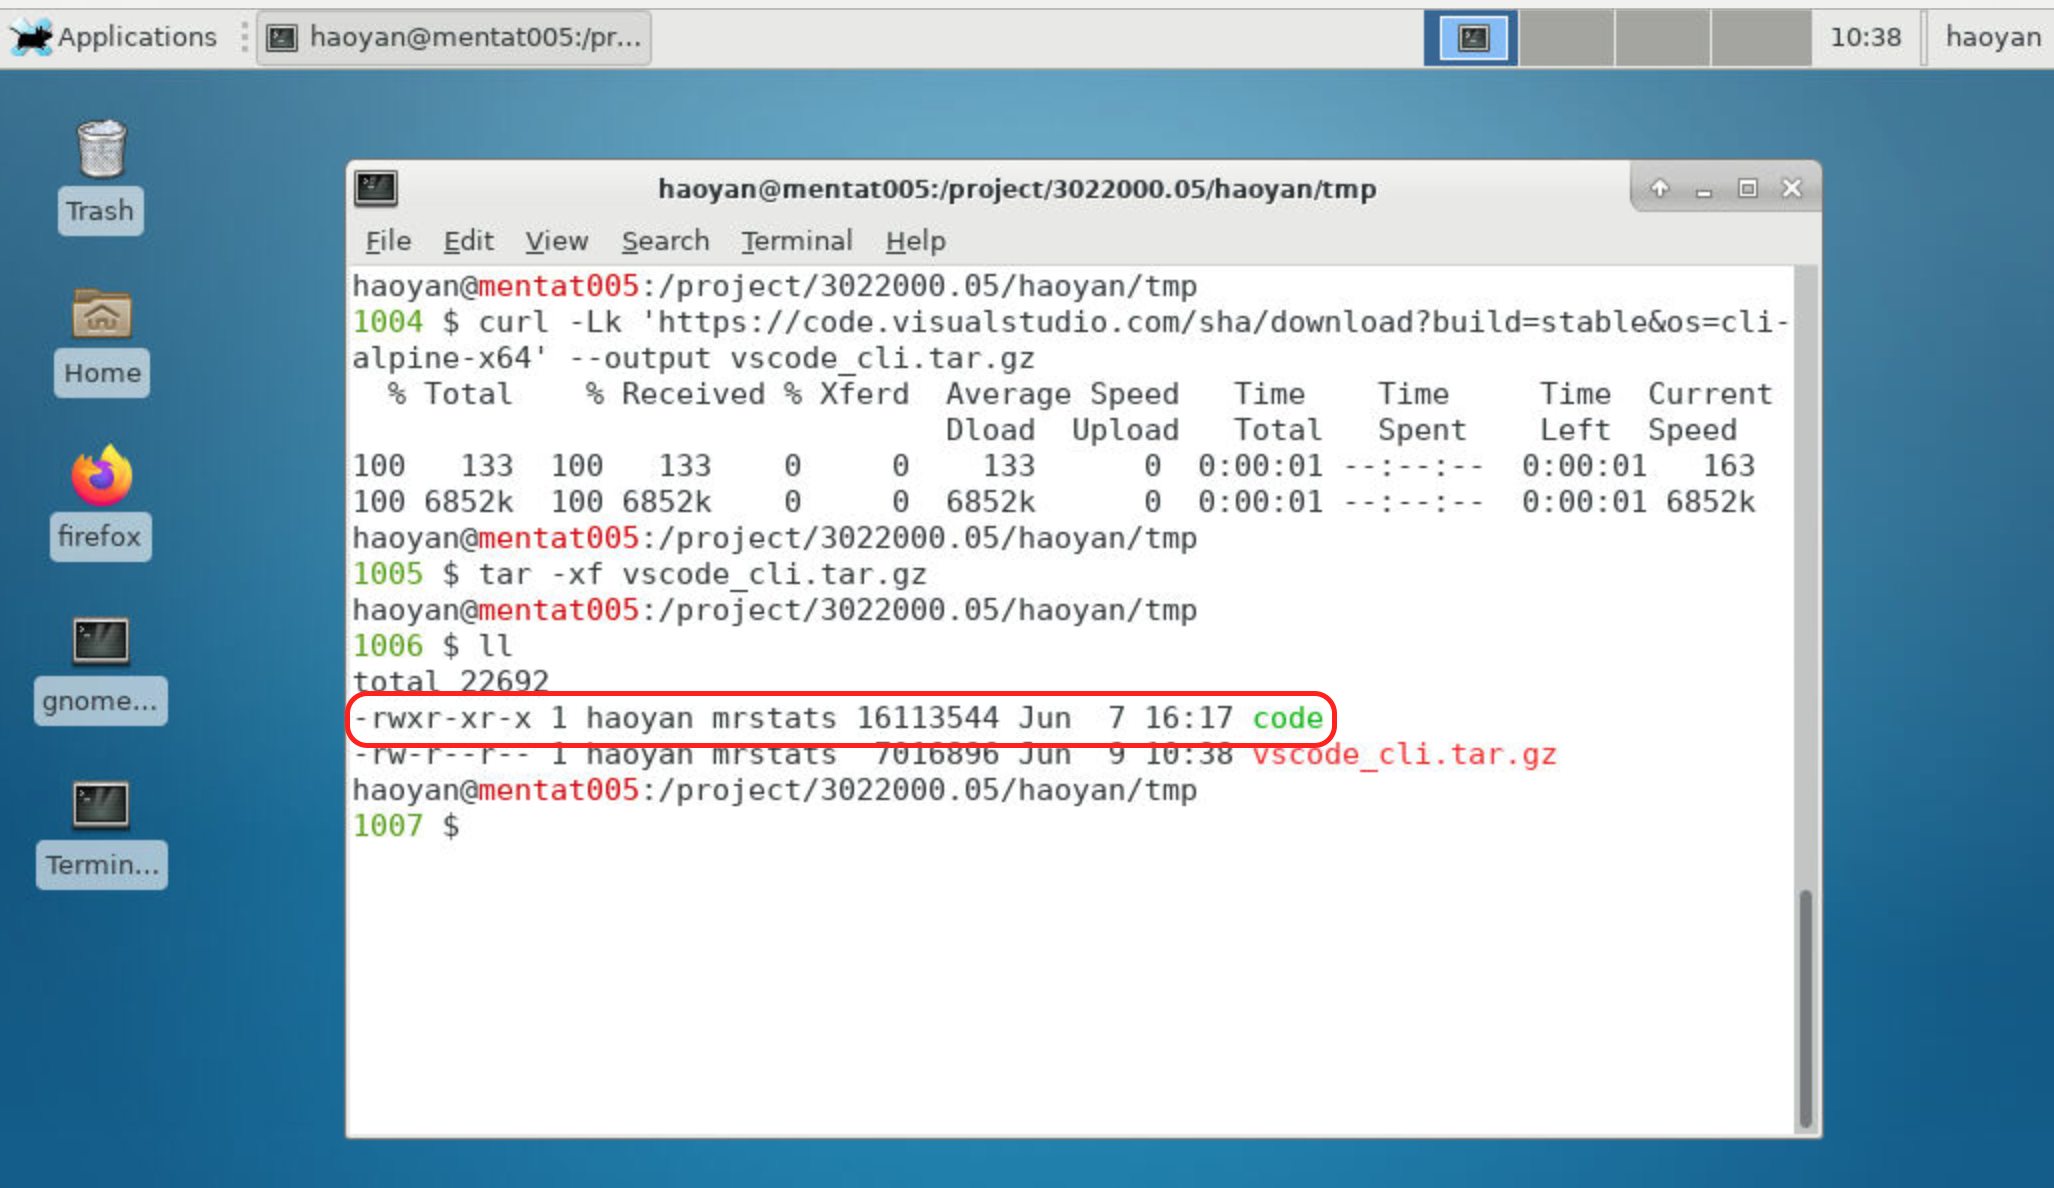
Login using VNC and start a Terminal. Download the standalone CLI in Linux x64. After running the following code you’ll get a binary file named ‘code’ in your home directory.
The idea of loading the vscode binary from within the singularity container is to provide the up-to-date glibc library required by the vscode server. The container image /opt/singularity/images/code_cli.sif provides glibc 2.35 via Ubuntu 22.04.
Login with you github account:
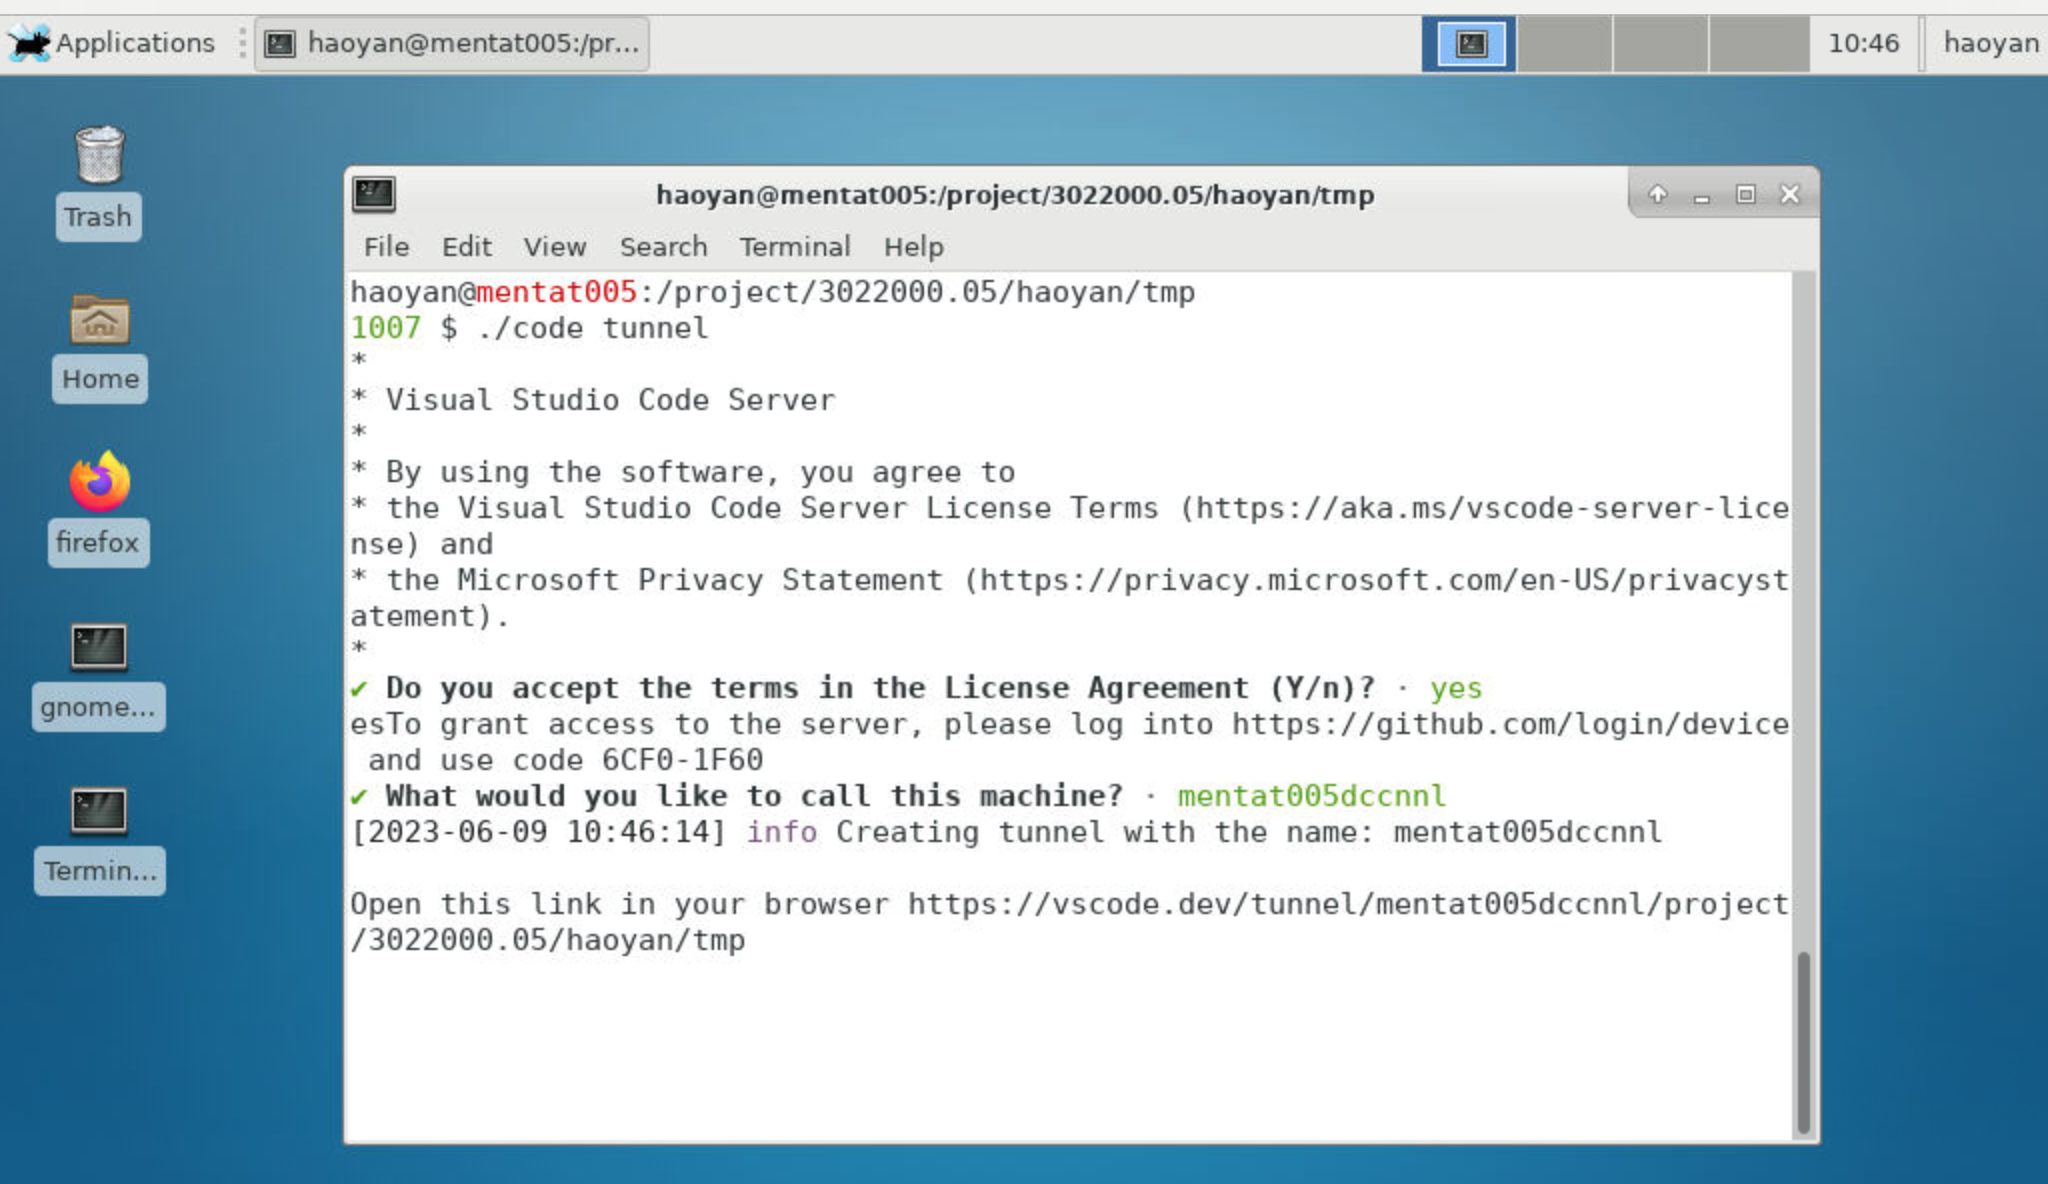
If success, you’ll see a link. You can now paste the link into your local browser and open VSCode from your laptop. Note that you only have to do this once. Be sure to leave this terminal open to maintain the tunnel forwarding.
Once the interactive job is finished or killed after running out of the walltime, the tunnel will also be closed. The tunnel can be restarted by repeating step 2 and 3 mentioned above.
Using the the VSCode Remote Extension (On ‘your’ local VSCode)
You can install and use the Remote - Tunnels extension on your local (e.g. personal laptop) to connect to remote machines with active tunnels.
To connect to a remote machine using the extension, follow these steps:
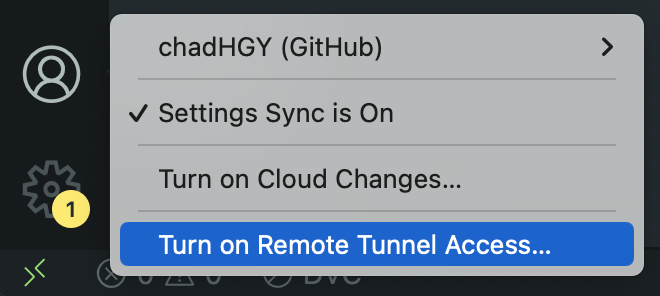
In the VS Code Account menu, select the option to Turn on Remote Tunnel Access, as demonstrated in the image below. You may also open the Command Palette (F1) in VS Code and run the command Remote Tunnels: Turn on Remote Tunnel Access….
You’ll be prompted to log into GitHub. Once you’re logged, you’ll be able to connect to your remote machine.